How to Connect Ceiling Speakers to Receiver: A Comprehensive Guide
Ceiling speakers are an excellent addition to any home theater system, providing a clean and discreet audio experience. However, setting them up can seem daunting, especially when connecting them to a receiver.
Fortunately, the process is straightforward and can be accomplished in just a few simple steps. In this article, we will provide a step-by-step guide on how to connect ceiling speakers to a receiver.
Contents
7 Steps to Connect Ceiling Speakers to Receiver
Gather Your Equipment
Before connecting your ceiling speakers to a receiver, you must gather some essential equipment. Here’s what you’ll need:
- A receiver
- Speaker cables
- A wire stripper or scissors
- A screwdriver
- A ladder or step stool (if your ceiling is high)
Step 1: Choose the Right Speaker Wire
When choosing a speaker wire, selecting the correct gauge is important. The gauge of a speaker wire refers to its thickness, and the thicker the wire, the less resistance it will have. Checking this is important because speakers require a certain amount of power to produce sound, and thicker wires can handle more power.
For ceiling speakers, we recommend using 16-gauge wire. This wire is thick enough to handle the power required for most ceiling speakers while still being flexible enough to run through walls and ceilings.
Step 2: Cut the Speaker Wire to Length
Measure the distance between your receiver and ceiling speakers to determine how much wire you need. Add a few extra feet to the total length to give yourself some wiggle room. Once you know how much wire you need, cut two pieces of speaker wire to that length.
Step 3: Strip the Speaker Wire
Using a wire stripper or scissors, strip the ends of each piece of speaker wire. You should strip about 1/2 inch of insulation from each end of the wire.
Step 4: Connect the Speaker Wire to the Receiver
Now it’s time to connect the speaker wire to the receiver.
- Locate the speaker outputs on the back of your receiver. There will typically be a red and a black output for each channel.
- Connect the positive (+) end of one of your speaker wires to the red output for the channel you want to connect your ceiling speaker to and connect the negative (-) end of the same wire to the black output for the same channel.
- Repeat this process for the other channel.
Step 5: Connect the Speaker Wire to the Ceiling Speakers
Now it’s time to connect the speaker wire to your ceiling speakers. Locate the speaker inputs on the back of your ceiling speaker. There will typically be a red and a black input for each channel and do the same process as you did in connecting the speaker wire to the receiver.
Step 6: Secure the Wires
To prevent the wires from coming loose, it’s important to secure them in place. Many receivers and ceiling speakers have screw terminals that allow you to secure the wires with screws. Use a screwdriver to tighten the screws until the wires are secure.
Step 7: Test Your Speakers
Now that your ceiling speakers are connected to your receiver, it’s time to test them. Turn on your receiver and play some music or a movie with surround sound. Check to ensure sound is coming out of each of your ceiling speakers. Double-check your connections if you hear sound coming from only one speaker or no sound at all.
Where should I install my ceiling speakers?
The location where you should install your ceiling speakers depends on several factors, such as the size and shape of your room, the number of speakers you plan to install, the listening position, and your preference. However, you can follow a few general guidelines to help you choose the optimal placement for your ceiling speakers.
Layout
First, consider the layout of your room. For a typical surround sound setup, you should install two speakers in front of the listening position and two speakers behind the listening position.
If you have a large room, install speakers on the sides of the listening position. You can also use the Dolby Atmos or DTS:X object-based surround sound formats to add additional speakers in the ceiling for a more immersive experience.
Angle
Once you have determined the placement of your speakers, consider the angle at which they will be installed. Ideally, your ceiling speakers should be installed at a 30 to 45-degree angle relative to the listening position. This will help to ensure that the sound is directed toward the listener and provides the best possible experience.
Height
Finally, you should also consider the height at which your ceiling speakers will be installed. The recommended height for ceiling speakers is usually around 8 to 12 feet above the floor, depending on the size of your room and the type of speakers you have. However, this can vary depending on your personal preference and the specific design of your room.
Overall, the key to finding the optimal placement for your ceiling speakers is to experiment and adjust until you find a setup that provides the best possible audio experience for your home theater.
How do I play music through my ceiling speakers?
To play music through your ceiling speakers, you need a device capable of sending audio signals to your receiver, which sends the signals to your speakers. There are several ways to do this, depending on your device type and the specific setup of your home theater system. Here are a few options:
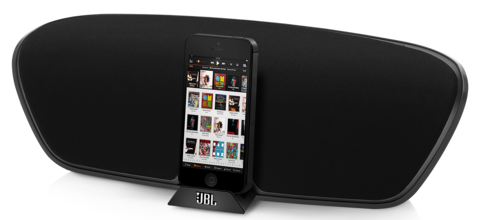
Use a Bluetooth receiver:
A Bluetooth receiver can be connected to your receiver via the auxiliary input and can receive audio signals from your smartphone, tablet, or another Bluetooth-enabled device. This allows you to stream music wirelessly to your ceiling speakers easily.
Connect your device directly to the receiver:
If your device has a headphone jack or RCA outputs, you can connect it directly to your receiver using an auxiliary or RCA cable. This allows you to play music from your device through your ceiling speakers.
Use a media player:
A media player such as an Apple TV, Amazon Fire TV, or Roku can be connected to your receiver and used to stream music from apps such as Spotify, Pandora, or Apple Music. This allows you to easily access and play music through your ceiling speakers without needing a separate device.
Use a multi-room audio system:
If you have a multi-room audio system such as Sonos or Yamaha MusicCast, you can connect your ceiling speakers to the system and play music from any room in your house. A smartphone app or voice control allows you to control and play music through your ceiling speakers easily.
Overall, there are several options for playing music through your ceiling speakers. The method you choose will depend on the specific setup of your home theater system and the devices you have available. You can easily enjoy high-quality music through your ceiling speakers with a little experimentation and adjustment.
Why do you need ceiling speakers?
Ceiling speakers can benefit your home theater system or audio setup. Here are some of the main reasons why you might consider installing ceiling speakers:
Space-saving:
Ceiling speakers can be a great space-saving solution for home theater setups or audio systems with limited floor space. Since they are mounted on the ceiling, they don’t take up any floor space or require any additional furniture to hold them.
Improved aesthetics:
Ceiling speakers can blend seamlessly into your room decor, providing a clean and clutter-free look. Unlike floor-standing or bookshelf speakers, ceiling speakers don’t require additional space or mounting hardware.
Enhanced sound quality:
Ceiling speakers can provide a more immersive audio experience than traditional speakers. The sound can be directed downward by placing the speakers above the listening position, creating a more natural and immersive sound field.
Flexible placement options:
Ceiling speakers can be installed in various locations and angles, allowing you to customize your audio setup to your specific room layout and personal preferences.
Ideal for multi-room audio:
Ceiling speakers are a popular choice for multi-room audio setups, where you want to have audio playing in multiple rooms simultaneously. Installing ceiling speakers in each room allows you to control and play audio throughout your house easily.
Conclusion
Connecting ceiling speakers to a receiver may seem intimidating, but it’s a straightforward process that can be completed in just a few simple steps. Following this guide, you can ensure that your ceiling speakers are properly connected and ready to provide high-quality audio for your home theater system.
It’s important to note that while this guide is specific to connecting ceiling speakers to a receiver, the same basic principles apply to connecting any type of speaker to a receiver. As long as you choose the correct gauge of wire, strip the wire correctly, and connect the positive and negative ends to the corresponding outputs and inputs, you can connect any type of speaker to your receiver.